
Upgrading to a solid-state drive can significantly enhance your computer’s performance. Whether you’re aiming to speed up your system, boost storage capacity, or replace an aging hard drive, a new drive can rejuvenate your desktop or laptop. This comprehensive guide will walk you through each step of the installation process, ensuring you feel confident even if you’re a first-time builder.
By successfully completing the upgrade, you’ll notice a dramatic reduction in boot times and faster application launches. Proper techniques not only improve performance but also protect your data integrity, ensuring your existing components remain safe. We will cover installations for both desktops and laptops, addressing the unique aspects of each.
Before diving in, remember to back up your important data. This precaution helps prevent any potential loss during the upgrade. The process is straightforward and requires only basic tools, making it an accessible DIY project for anyone willing to follow clear instructions.
Investing time in a proper installation pays off with years of faster, more reliable computing. Let’s explore the topics ahead, including understanding SSD types, physical installation for SATA and M.2 drives, system configuration, and troubleshooting common issues.
Key Takeaways
- Upgrading to a solid-state drive enhances system performance.
- Proper installation techniques protect data integrity.
- Both desktop and laptop installations are covered.
- Backing up data is crucial before starting the upgrade.
- The process is accessible and requires basic tools.
Why Upgrade to an SSD?
Switching from a traditional hard drive to a solid-state drive can transform your computing experience. The advantages are numerous, particularly in terms of speed and reliability. This upgrade not only enhances your system’s performance but also provides a more enjoyable user experience.
Benefits of SSD Installation for Speed and Reliability
One of the most significant benefits of upgrading is the dramatic speed improvement. Boot times can drop from minutes to mere seconds, and applications launch almost instantly. This transformation makes daily tasks much more efficient.
SSDs achieve faster read and write speeds compared to hard drives. They utilize flash memory with no moving parts, eliminating mechanical delays. This technology allows for near-instant data access, making your computer feel snappier and more responsive.
Enhanced System and Gaming Performance
The performance boost extends beyond just booting up. File transfers complete in a fraction of the time, and multitasking becomes seamless. Users experience a frustration-free environment, whether they are working or gaming.
In gaming, SSDs significantly reduce level load times. They eliminate texture pop-ins during open-world gameplay, providing smoother frame rates. This improvement enhances the overall gaming experience, making it more immersive.
Durability and Energy Efficiency
Another advantage of solid-state drives is their durability. Without fragile spinning platters, SSDs are less susceptible to physical damage from bumps or drops. This makes them ideal for laptops that travel frequently.
Additionally, SSDs consume less power than traditional hard drives. This not only lowers electricity costs but also reduces heat output inside your system. A cooler, quieter machine is a significant perk for any user.
Investing in an SSD can extend the useful life of an older computer. It restores performance that rivals modern machines, delaying the need for a costly new system purchase. Furthermore, SSDs operate silently, eliminating the whirring and clicking sounds associated with hard drives.
In conclusion, upgrading to a solid-state drive is one of the most impactful changes you can make to your computer. It delivers immediate, noticeable improvements across every aspect of system operation.
Preparing for Your SSD Installation
A well-planned approach is key to ensuring your SSD upgrade goes smoothly. This preparation phase involves selecting the right drive and gathering essential tools. Let’s break down the steps you need to take before you begin.
Selecting the Right SSD for Your System
Choosing the right SSD for your computer is the first step. Consider factors like storage capacity, read/write speeds, and compatibility with your system. Seagate offers a variety of SSDs to fit different needs, from basic computing to high-performance gaming.
Check your motherboard’s compatibility. Consult your system documentation or the manufacturer’s website to confirm whether your board supports SATA, M.2 SATA, or M.2 NVMe drives. This will save you time and potential headaches later on.
Capacity is another important consideration. Decide between options like 500GB, 1TB, or larger drives based on your usage patterns. If you store large game libraries or work with video files, a higher capacity may be necessary.
Gathering Essential Tools and Backing Up Data
Before you start the installation process, gather the necessary tools. You will need a Phillips-head screwdriver, an anti-static wrist strap to prevent electrostatic discharge, and any mounting brackets or adapters for securing a 2.5-inch drive in a desktop case.
Backing up your important data is crucial. Use external hard drives or cloud storage solutions to create redundant copies of irreplaceable files. This precaution keeps your data safe in case something goes wrong during the upgrade.
Additionally, ensure your motherboard’s BIOS or UEFI firmware is updated to the latest version. Outdated firmware can lead to recognition issues, especially with modern NVMe drives.
Consider downloading necessary software, such as cloning tools like Seagate DiscWizard or Macrium Reflect, and save them to a USB drive for easy access during the configuration phase.
For laptop users, check your device’s service manual for specific disassembly instructions. Accessing the drive bay can vary significantly between models, so be prepared with the right tools.
Finally, clear a clean, well-lit workspace with enough room to lay out components and screws. This reduces the risk of losing small parts during the installation.
By taking the time to gather tools, back up data, and verify compatibility, you set the stage for a smooth, stress-free SSD installation experience.
| SSD Type | Capacity Options | Ideal For |
|---|---|---|
| SATA SSD | 500GB, 1TB | General use, gaming |
| M.2 NVMe SSD | 1TB, 2TB | High-performance gaming, video editing |
Understanding SSD Types: SATA vs. M.2 NVMe
Understanding the different types of solid-state drives is essential for maximizing your upgrade. The two main types, SATA and M.2 NVMe, each have unique characteristics and benefits. Let’s explore these options to help you make an informed choice.
Characteristics and Use Cases for SATA SSDs
SATA SSDs use the familiar 2.5-inch form factor. They connect via standard SATA data and power cables. This makes them the easiest upgrade path for older desktops and laptops.
With read and write speeds up to 600MB/s, SATA drives are about four to five times faster than traditional hard drives. This speed boost significantly improves boot times, application launches, and file transfers.
Common use cases for SATA SSDs include breathing new life into older systems that lack M.2 slots. They also serve as affordable secondary storage for game libraries or media files. For first-time SSD upgraders, SATA drives provide a budget-friendly entry point.
Benefits and Installation Considerations for M.2 NVMe SSDs
M.2 NVMe SSDs represent the high-performance option. These compact drives plug directly into a dedicated slot on the motherboard. They communicate over the PCIe interface, enabling blazing speeds up to 7,000MB/s on modern Gen4 and Gen5 models.
The benefits of M.2 NVMe drives shine in demanding workloads like 4K video editing and high-end gaming. Near-instant load times and rapid asset streaming eliminate bottlenecks, ensuring smooth creative workflows.
However, installation considerations are crucial. M.2 drives require a compatible motherboard slot and may share bandwidth with other PCIe devices. They can generate significant heat under sustained loads, making heatsinks or integrated cooling solutions worth considering.
It’s essential to distinguish between M.2 SATA and M.2 NVMe drives. An M.2 slot may support only one protocol or both. Installing an incompatible drive will result in the system failing to recognize the new SSD.
Consult your motherboard manual or manufacturer website to confirm which M.2 slots are available and what protocols they support. This can affect your plans for additional drives.
In terms of physical installation, SATA SSDs require mounting in a drive bay and connecting two cables. M.2 SSDs, on the other hand, snap directly into the motherboard with a single screw. This results in a cleaner build with fewer cables to manage.
Ultimately, choosing the right SSD type depends on your system’s compatibility, performance needs, and budget. Both SATA and NVMe options deliver transformative speed improvements over any hard drive.
Step-by-Step SATA SSD Installation Process
Embarking on the journey of installing a SATA SSD can be an exciting and rewarding experience. Follow these steps to ensure a smooth and successful upgrade for your computer.
Opening Your PC Case and Mounting the SSD
Start by powering down your computer and unplugging it from the power source. To ensure safety, press the power button briefly to discharge any residual electricity. Next, remove the screws holding the side panel in place and carefully slide it off. Set the panel aside in a safe location where it won’t get scratched or bent.
Now, locate an available mounting bracket or bay inside your computer case. Many modern cases include tool-less trays or dedicated SSD mounts, making it easier to secure the new SSD without additional adapters. If your case does not have a dedicated slot, use the included mounting brackets or screws to secure the drive.
When mounting the SSD, ensure that the SATA connectors face the cable management area for easier access. This orientation will help with cable routing later on.
Connecting SATA Data and Power Cables
Next, it’s time to connect the cables. Attach one end of the SATA data cable to the SSD and the other end to an available SATA port on your motherboard. It’s recommended to use the lowest-numbered port for the primary drive to avoid boot priority confusion.
Now, locate a SATA power connector from your power supply and plug it firmly into the SSD. Make sure both the data and power cables are fully seated to prevent any intermittent recognition issues.
For better cable management, consider routing cables behind the motherboard tray. Using zip ties or Velcro straps can help keep airflow paths clear, maintaining optimal cooling and creating a clean, professional-looking build.
Closing the Case and Powering On
Before closing the case, double-check all connections. Ensure the SSD is secure, both cables are firmly attached, and no loose screws or tools are left inside the computer that could cause shorts.
Reassemble the case by sliding the side panel back into place and securing it with the original screws. Reconnect the power cable and any peripherals that were disconnected earlier.
Finally, power on your computer and listen for the SSD to be recognized. The drive may not appear in Windows immediately, but it should be visible in the BIOS/UEFI. This recognition sets the stage for the configuration steps ahead.
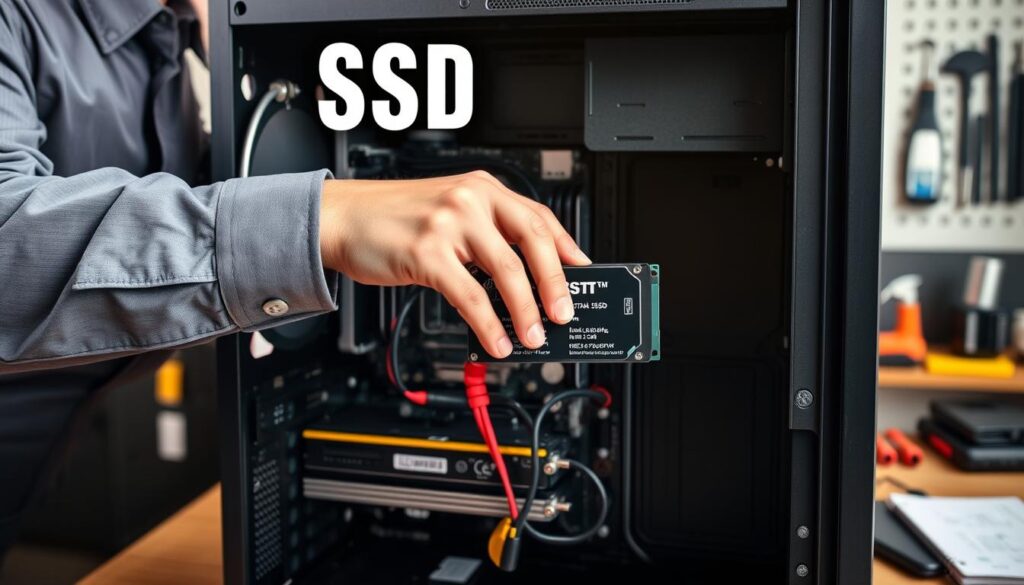
Step-by-Step M.2 SSD Installation Process
Installing an M.2 SSD is a straightforward process that can elevate your computer’s performance. This form factor eliminates the need for cables, allowing for a clean installation that maximizes airflow and minimizes clutter. Let’s dive into the steps to ensure a successful upgrade.
Locating and Preparing the M.2 Slot
First, safely power down your computer and unplug it from the wall. Discharge any residual electricity by pressing the power button for a few seconds. Next, remove the side panel of your case to access the internal components.
Now, locate the M.2 slot on your motherboard. It’s typically labeled and may already have a small screw in place. If your motherboard has multiple slots, consult the manual to find the primary one, usually positioned near the CPU for optimal performance.
Carefully remove the tiny mounting screw from the M.2 slot standoff. Be cautious, as this screw is small and easy to misplace. Consider using a magnetic tray to keep it safe during the installation process.
Installing and Securing the M.2 SSD
With the screw set aside, align the connector edge of the M.2 NVMe SSD with the M.2 slot. Insert the drive at a slight angle, approximately 30 degrees. Gently push the SSD down until it lies flat against the motherboard.
Once the SSD is in place, secure it using the screw you removed earlier. Be careful not to overtighten, as this could damage the motherboard. Some motherboards come with integrated heatsinks or thermal pads for M.2 slots. If yours does, follow the manufacturer’s instructions for proper installation to prevent overheating during use.
Closing the Case and Powering On
Before closing the case, double-check that the SSD is securely seated and the screw is snug. A loose drive can lead to connection issues. Slide the side panel back into place and secure it with screws.
Reconnect your computer to the power source and turn it on. If everything is set up correctly, the M.2 SSD should appear in the BIOS/UEFI immediately. If you encounter any recognition issues, they are likely related to BIOS settings rather than physical installation errors.
Congratulations! You’ve successfully installed your new M.2 SSD. Once you experience the near-instant boot times and application launches, you’ll appreciate the effort you put into researching compatibility and handling the tiny screw.
Configuring Your SSD for Optimal Performance
To fully utilize your new drive’s capabilities, proper configuration is essential. Even with a flawless installation, your drive needs the right settings in the BIOS/UEFI and Windows to perform at its best. Let’s walk through the necessary steps to ensure everything is set up correctly.
Setting Up BIOS/UEFI and Boot Priority
Start by restarting your computer. During the startup, press the designated key—usually F2, F10, Del, or Esc—to enter the BIOS/UEFI settings. Once inside, navigate to the storage settings or boot menu. Here, you can verify that your new drive is detected.
If you’re installing the drive as your primary system drive, make sure to set it as the first boot device in the boot priority order. This step is crucial for the system to load the operating system from the new drive.
Formatting and Partitioning Your New SSD
Next, you’ll need to format and partition your new drive. Access Disk Management by right-clicking the Start button and selecting it from the menu. If prompted, initialize the SSD by choosing either MBR or GPT as the partition style. For modern systems, GPT is recommended.
After initialization, right-click on the unallocated space on your SSD. Select “New Simple Volume” and follow the wizard. Assign a drive letter that makes sense for your workflow and choose NTFS as the file system. A quick format will prepare the drive for use within minutes.
Optional: Cloning Your Existing Drive to the SSD
If you want to transfer your existing operating system, applications, and files to the new drive without reinstalling everything, consider cloning your current drive. This process can save you hours of setup time and preserve your personalized settings.
Popular cloning tools include Seagate DiscWizard, Macrium Reflect, and Samsung Magician. The basic workflow involves selecting your source drive, choosing the destination SSD, and starting the clone process. Ensure the destination drive has sufficient capacity to hold all the data.
Here are some practical tips for cloning:
- Temporarily disconnect unnecessary drives to avoid accidental overwrites.
- Run a disk cleanup on the source drive to reduce clone time.
- Verify that the clone completed successfully before removing or reformatting the original drive.
Finally, remember to enable AHCI mode in the BIOS for SATA drives. Verify that TRIM is active in Windows to maintain long-term performance. Disable automatic defragmentation since SSDs do not benefit from traditional defragmentation and it can reduce the drive’s lifespan.

Troubleshooting Common SSD Installation Issues
Encountering issues during your drive upgrade can be frustrating, but many solutions exist. This section will guide you through common problems and how to resolve them effectively.
SSD Not Recognized in System
If your new drive isn’t recognized, start by checking all physical connections. Ensure that both the SATA data and power cables are securely connected to the drive and the motherboard. For M.2 drives, confirm that it is properly seated in the slot and secured with a screw.
Sometimes, an outdated BIOS/UEFI version can cause recognition issues. Visit your motherboard manufacturer’s website to download the latest update. Additionally, ensure that AHCI mode is enabled for SATA drives in the BIOS settings. This can help your system detect modern drives more effectively.
Boot Problems after Installation
Boot issues can arise after installing a new drive. First, check the boot order in the BIOS/UEFI. Make sure your new drive is set as the primary boot device. If you cloned your operating system, verify that the drive contains a valid bootloader.
If problems persist, you can use Windows installation media to repair the boot sector. Boot from the media, select “Repair Your Computer,” and run the Startup Repair tool. This can often fix common boot problems without losing data.
Data Transfer and Cloning Challenges
When transferring data, confirm that your cloning software is compatible with both the source drive and the new drive. Make sure the destination SSD has enough space to hold all the data. If your first cloning attempt fails, consider trying alternative software options.
Before cloning, check the available disk space on the source drive. The destination SSD should have equal or greater capacity than the used space on the source drive. Free up space by deleting unnecessary files or uninstalling unused applications.
Finally, run a disk checking utility like CHKDSK on the source drive before cloning. This can help identify and fix any file system errors that might disrupt the cloning process.
Remember, most installation issues have straightforward solutions. If problems continue, don’t hesitate to consult your drive manufacturer’s support resources or seek help from online forums and professional technicians.
Conclusion
Wrapping up your installation journey is a rewarding moment that sets the stage for improved performance. You have taken a significant step toward faster, more reliable computing that will pay dividends every time you power on your computer.
Now, enjoy dramatically reduced boot times, near-instant application launches, and smoother multitasking. Your desktop or laptop will feel like a brand-new machine!
Remember, the skills you’ve gained—like opening a PC case and managing disks—are foundational for future upgrades. Explore additional optimizations, such as enabling TRIM and updating firmware, to maintain peak performance.
If you faced challenges, don’t worry! Troubleshooting is part of the learning process, and help is available from online communities and manufacturer support.
Finally, share your success stories or questions in the comments. Celebrate the transformative power of SSD technology and enjoy your upgraded system!
FAQ
What are the main benefits of upgrading to a solid-state drive?
Upgrading to a solid-state drive can significantly improve your computer’s speed and reliability. You’ll notice faster boot times, quicker application launches, and enhanced overall system performance.
How do I choose the right SSD for my laptop or desktop?
When selecting a new drive, consider factors like storage capacity, interface type (SATA or M.2 NVMe), and compatibility with your motherboard. Make sure to check the manufacturer’s specifications for your system.
What tools do I need for the installation process?
Essential tools include a screwdriver, an anti-static wrist strap, and any necessary cables. Additionally, it’s wise to back up your data before starting the installation.
How do I install a SATA SSD in my computer?
First, open your PC case and mount the SSD securely. Next, connect the SATA data and power cables, then close the case and power on your system to complete the process.
What steps are involved in installing an M.2 SSD?
Locate the M.2 slot on your motherboard, then insert and secure the SSD in place. After that, close the case and power on your computer to finish the installation.
How can I configure my new SSD for optimal performance?
Access your BIOS/UEFI settings to set the boot priority. Then, format and partition the drive as needed. If desired, you can also clone your existing drive to the new SSD for a seamless transition.
What should I do if my SSD is not recognized after installation?
If your drive isn’t detected, check the connections to ensure they are secure. You may also need to adjust BIOS settings or update your system drivers.
What if I encounter boot problems after installing the SSD?
Boot issues can arise if the boot order is incorrect. Ensure your new drive is set as the primary boot device in BIOS. If problems persist, you may need to troubleshoot further.
How can I address data transfer challenges when cloning my existing drive?
Use reliable cloning software and ensure both drives are connected properly. Follow the software instructions carefully to avoid data loss during the transfer process.