
Welcome to the exciting world of storage upgrades! If you’re looking to breathe new life into your aging computer or laptop, you’re in the right place. This guide will take you through a step-by-step process to enhance your device’s performance significantly.
Switching to a solid-state drive (SSD) can make a world of difference. You’ll experience faster boot times, quicker application launches, and an overall snappier system. The modern M.2 NVMe SSDs are especially impressive, boasting incredible read and write speeds that can transform how you use your computer.
In this guide, we will cover everything from understanding the benefits of an SSD to the physical installation and configuration. We’ll also highlight the reliability of SSDs compared to traditional hard drives, emphasizing their lack of moving parts. This means fewer mechanical failures and a longer lifespan for your data.
Before we dive in, it’s crucial to back up your data. This first step ensures that your precious files are safe during the upgrade process. Get ready to enhance your computing experience!
Key Takeaways
- Learn how a simple hardware swap can improve your computer’s speed.
- Understand the benefits of switching to an SSD for better performance.
- Discover the reliability advantages of solid-state storage.
- Find out what tools and software you’ll need for the upgrade.
- Get tips on data backup before starting the installation process.
Understanding the Benefits and User Intent of an SSD Upgrade
Let’s explore the remarkable advantages of switching to a solid-state drive. An SSD upgrade is one of the most impactful improvements you can make to any computer. Storage bottlenecks often lead to sluggish performance, and this is where SSDs shine.
Many users consider an SSD upgrade for various reasons. Some want to extend the life of an older laptop, while others aim to boost gaming performance. Additionally, content creators seek to accelerate their workflows, enjoying a more responsive daily computing experience.
Modern SSDs offer speed advantages over traditional hard disk drives. For instance, NVMe SSDs can deliver read and write speeds that are multiple times faster than SATA-based options. This translates into real-world benefits, such as near-instant boot times and rapid file transfers.
Moreover, solid-state drives provide enhanced reliability and durability. With no moving parts, they are less susceptible to damage from drops or vibrations compared to traditional hard drives. This feature is especially important for laptop users who are often on the go.
Another significant advantage is the silent operation and energy efficiency of SSDs. This is particularly valuable for laptop users seeking extended battery life and a quieter computing environment. For gamers, an SSD upgrade reduces level load times and eliminates texture pop-in, resulting in a smoother overall gaming experience.
The compact form factor of M.2 SSDs makes them perfect for modern ultrabooks and slim laptops. They connect directly to the motherboard, simplifying installation and improving cable management.
In summary, investing in an SSD upgrade enhances both performance and reliability. The benefits extend far beyond raw speed numbers, making it a wise choice for anyone looking to improve their computing experience.
| Feature | Traditional HDD | SSD |
|---|---|---|
| Read/Write Speeds | Up to 160 MB/s | Up to 5000 MB/s (NVMe) |
| Noise Level | Mechanical noise | Silent operation |
| Durability | Susceptible to shocks | More durable due to no moving parts |
| Power Consumption | Higher | Lower, extending battery life |
Preparing for Your SSD Upgrade: Tools, Backup, and Compatibility
Before diving into the exciting process of enhancing your device, it’s essential to prepare adequately. This preparation phase is crucial for a smooth transition to a solid-state drive.
Start by gathering the necessary tools and materials. You’ll need a compatible Sandisk M.2 NVMe internal SSD, a crosshead screwdriver, and an external USB M.2 NVMe enclosure. A small plastic prying tool can also be helpful, though it’s optional.
Next, make sure to back up all important data. Use a reliable storage device, like a Sandisk external SSD, to create a complete backup of your files, documents, and media. This step is vital to ensure your data remains safe during the upgrade process.
To check compatibility, visit Sandisk Support or consult your device’s documentation. This will help you confirm the availability of M.2 slots and supported form factors.
Determine how many M.2 slots your laptop has. If you have a single slot, you will follow Path A, which involves cloning your drive using the USB enclosure. If your laptop has two slots, continue with Path B, allowing for direct internal cloning.
Download the necessary software in advance, specifically Acronis True Image for Sandisk. This software will help you clone your existing drive onto the new SSD safely and efficiently.
Gather all materials before starting. Ensure you have a clean, static-free workspace. Discharge any static electricity by touching bare metal before handling internal components.
It’s also important to review your laptop or desktop’s service manual for specific disassembly instructions. Case designs vary, and you may need to use a plastic tool to gently pry open the case without causing damage.
Set aside adequate time for the upgrade, approximately 45 to 90 minutes. Patience and careful attention to each step will yield the best results.
Remember, preparation is half the battle. Taking these preliminary steps seriously will make the installation process smooth and stress-free. Even first-time upgraders can successfully complete this project by following this guide closely.
Choosing the Right SSD for Your Laptop or Desktop
Selecting the ideal storage solution can greatly enhance your computing experience. With so many options available, it’s essential to understand the differences between various types of solid-state drives. This knowledge will help you make an informed decision that meets your specific needs.
First, let’s break down the key differences between SATA SSDs and NVMe SSDs. SATA drives are generally slower, with read and write speeds that can’t compete with NVMe drives. NVMe SSDs utilize PCIe lanes, enabling them to achieve speeds several times faster than traditional hard drives. This performance boost can significantly impact your overall computing experience, especially in gaming and heavy applications.
Next, consider the form factor. The M.2 standard has become the go-to for modern laptops and desktops. Within this standard, physical size variations like 2280 determine compatibility with specific devices. Be sure to check your laptop or desktop specifications to ensure a proper fit.
When it comes to storage capacity, think about your usage. A budget-friendly 500GB drive may suffice for everyday computing. However, if you’re a gamer or a content creator, you might need a 1TB SSD or larger. This capacity allows for ample space for games, media libraries, and professional projects.
For gaming enthusiasts, high-performance NVMe SSDs are essential. They provide the fast read and write speeds necessary for reducing level load times and handling large open-world game assets smoothly. This improvement can enhance your gaming experience significantly.
Laptop users should also pay attention to their device’s design. Ultrabooks and slim models often require single-sided M.2 SSDs due to space constraints. Always verify your device specifications before making a purchase to avoid compatibility issues.
Lastly, it’s important to note that all current MacBook Air and MacBook Pro models feature soldered storage. This means the SSD cannot be upgraded or replaced by the user. Therefore, this guide primarily applies to Windows laptops and desktop computers.
To make your decision easier, consider using the comparison tools available on the Sandisk website. You can filter by form factor, capacity, and performance tier to find the ideal match for your system.
In conclusion, choosing the right SSD is an investment in both speed and reliability. Taking the time to research ensures you will be satisfied with your upgrade for years to come. And remember to double-check slot availability and interface compatibility before making a purchase to prevent any installation frustrations.
How to Clone Your Drive Using Acronis True Image for Sandisk
Cloning your drive is a crucial step in ensuring a seamless transition to your new storage solution. This process allows you to transfer the entire contents of your existing drive onto a new SSD without the hassle of reinstalling your operating system or applications.
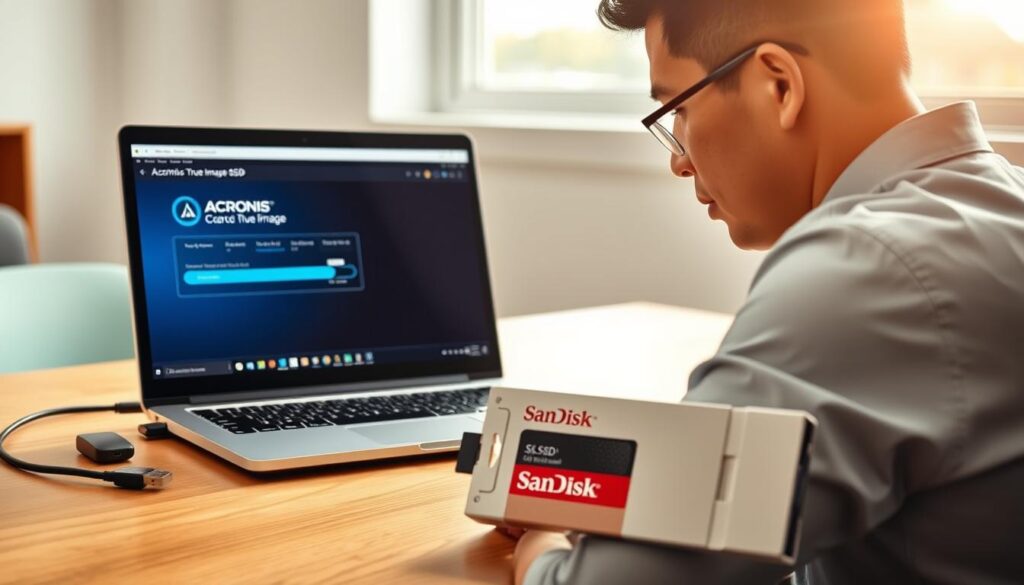
To begin, you will need an external USB M.2 NVMe enclosure. This device converts your new M.2 SSD into a temporary external disk drive, allowing it to connect to your computer via a standard USB port for the cloning operation.
Setting Up the USB Enclosure
Follow these steps to set up your USB enclosure:
- Carefully insert the M.2 SSD into the enclosure.
- Secure it in place according to the enclosure’s instructions.
- Connect the enclosure to your laptop or desktop computer.
Cloning Your Existing Drive Safely
Next, download and install Acronis True Image for Sandisk. This software is specifically designed for Sandisk SSD upgrades and provides a user-friendly interface for the cloning process.
Once installed, launch the software and follow these steps:
- Select your source drive (the existing boot drive).
- Choose the destination drive (the new SSD in the USB enclosure).
WARNING: Be extremely careful when selecting drives. Choosing the wrong drive could overwrite important data on a secondary HDD or storage device. Always double-check drive labels and capacities before proceeding.
After the cloning process completes, your new SSD will contain an exact image of the original drive, including the operating system, applications, settings, and personal files. This makes it ready to boot immediately after installation.
Additionally, you can repurpose the old drive as an external USB drive by placing it back into the enclosure. This provides extra portable storage for backups or file transfers.
Rest assured, Acronis True Image handles partition resizing automatically when moving to a larger capacity SSD, so no manual adjustments are typically needed.
While cloning may seem technical, Acronis True Image for Sandisk simplifies the process significantly. By paying careful attention to drive selection, you can ensure a smooth, worry-free experience.
Step-by-Step Installation Guide
Installing a new storage drive can be a rewarding experience. The process varies depending on whether your laptop has a single M.2 slot or multiple M.2 slots. Follow the appropriate path for your specific device to ensure a smooth installation.
Installing in Laptops with a Single M.2 Slot
For laptops with a single M.2 slot, the installation process begins with cloning your existing drive. This ensures all your data is safely transferred to the new SSD before any hardware changes.
- Plug your new M.2 SSD into the external M.2 NVMe enclosure. Connect it to your laptop via USB. Use Acronis True Image for Sandisk to create a copy of your current SSD drive.
- Shut down your laptop. Unplug the power adapter and any other connected cables. If your laptop has a detachable battery, remove it for safety.
- Using a crosshead screwdriver, remove the screws from the bottom of the laptop. Carefully open the laptop case. You may need to pry it open gently with a plastic tool. Remember to touch bare metal to discharge any static electricity before handling internal components.
- Locate the M.2 slot on your laptop’s motherboard. This slot is often found under a metal shield or near the RAM slots. Unscrew your old SSD and remove it.
- Insert the new M.2 SSD at a slight angle into the M.2 slot. Ensure the notches on the SSD align with the keys in the slot. Press the SSD down and secure it with the screw.
- Close the laptop case/panel. Reattach the battery if it was removed. Screw the bottom of the laptop back in place. Reconnect your power cable.
- Power on the laptop. Enter the BIOS/UEFI settings to ensure the M.2 SSD is recognized as the boot drive. Boot into your operating system and verify that the M.2 SSD is functioning properly. Use the Sandisk Dashboard app to check for the latest SSD firmware updates.
Installing in Laptops with Multiple M.2 Slots
If your laptop has multiple M.2 slots, you can take advantage of this by installing the new SSD into the secondary slot first. This allows you to clone the boot drive directly inside the laptop.
- Consult your laptop manual to identify which M.2 slot offers the highest bandwidth. Prepare to install the new SSD into the secondary slot.
- Shut down your laptop. Unplug the power adapter and any other connected cables. Remove the battery if it is detachable.
- Use a crosshead screwdriver to remove the screws from the bottom of the laptop. Carefully open the laptop case, using a plastic tool if necessary. Discharge any static electricity by touching bare metal.
- Locate the M.2 slot on your laptop’s motherboard. Insert the new M.2 SSD at a slight angle into the secondary M.2 slot. Ensure the notches align with the keys in the slot. Press the SSD down and secure it with the screw.
- Use Acronis True Image for Sandisk to create an exact copy of your currently installed boot drive onto the new SSD in the secondary slot.
- Shut down your laptop. Remove the old SSD you just cloned. Move your new SSD from the secondary slot into the primary slot and secure it with the screw.
- You can insert a secondary SSD into the open slot, whether it’s the old SSD you’ve just cloned, an additional M.2 SSD, or leave it empty.
- Close the laptop case/panel. Reattach the battery if it was removed. Screw the bottom of the laptop back in place. Reconnect your power cable.
- Power on the laptop. Enter the BIOS/UEFI settings to ensure the M.2 SSD is recognized as the boot drive. Boot into your operating system and verify that the M.2 SSD is functioning properly. Use the Sandisk Dashboard app to ensure your laptop is running the latest SSD firmware; update firmware if needed.
While these steps may seem numerous, each one is straightforward. Taking the time to follow them methodically ensures a successful SSD installation without damaging your laptop or data.
Post-Installation Setup: BIOS Configuration and Firmware Updates
With your SSD successfully installed, let’s dive into the essential configurations that follow. This step is vital for ensuring that your new drive operates at its best.
First, power on your laptop. Immediately enter the BIOS or UEFI settings. This is usually done by pressing a key like F2, F10, DEL, or ESC during startup. Once inside, navigate to the boot menu.
Check to ensure that your new SSD is recognized as the primary boot device. This is crucial because it allows your system to load from the new drive rather than an empty slot or secondary drive.
Next, confirm that the boot order is set correctly. Your laptop should start from the newly installed SSD. This ensures that you can enjoy faster boot times and improved performance right away.
After configuring the BIOS, boot into your operating system. Confirm that everything is functioning properly. The operating system should load quickly, and all your files and applications should be intact. Make sure the reported storage capacity matches your expectations.
Now, let’s introduce the Sandisk Dashboard app. This tool is essential for post-installation optimization. It allows you to monitor the health of your drive, check temperatures, and ensure that your SSD is running the latest firmware.
To update the firmware, open the Sandisk Dashboard app and follow the prompts. Keeping your firmware current can resolve compatibility issues, improve performance, and extend the lifespan of your SSD.
Additionally, explore the app’s features like drive performance benchmarking and health monitoring. These tools help maintain your SSD in optimal condition over time.
Once everything is confirmed working, you can format your old drive and repurpose it as external storage using the USB enclosure. This gives you extra space for backups or portable file transfers.
Don’t worry if your system doesn’t immediately recognize the new drive. Minor post-installation hiccups can usually be resolved by revisiting BIOS settings or reseating the SSD in its slot.
In conclusion, completing these final checks ensures that your SSD upgrade delivers its full potential in terms of speed, reliability, and long-term satisfaction.
| Action | Details |
|---|---|
| Enter BIOS/UEFI | Press F2, F10, DEL, or ESC during startup. |
| Check Boot Order | Ensure the new SSD is set as the primary boot device. |
| Boot into OS | Verify the operating system loads quickly and all files are intact. |
| Use Sandisk Dashboard | Monitor drive health and update firmware as needed. |

Conclusion
Completing your storage enhancement journey is a moment worth celebrating. You’ve successfully installed your new drive and are already enjoying faster boot times and snappier application launches. This upgrade not only boosts your computer’s performance but also enhances your gaming experience.
The skills you’ve learned, from backing up data to handling laptop components, empower you for future upgrades. Don’t forget to explore Sandisk.com/Support for helpful tips and troubleshooting guides.
Consider upgrading other devices in your home, like a desktop or gaming console, using your newfound knowledge. Your old drive can now serve as a portable storage device, perfect for backups or transferring files.
Remember to keep your firmware updated through the Sandisk Dashboard app to maintain peak performance. Thank you for trusting this guide, and feel free to share your upgrade success stories!
Your upgraded system is now ready to handle years of productivity, creativity, and entertainment. Enjoy your revitalized device!
FAQ
What is the main advantage of using an SSD over a traditional hard drive?
The primary benefit of an SSD is its significantly faster read and write speeds, which can lead to quicker boot times and improved overall performance for applications and gaming.
How do I know if my laptop is compatible with an SSD?
Check your laptop’s specifications to see if it has an available M.2 slot or a 2.5-inch drive bay. You can also consult the manufacturer’s website for compatibility information.
Can I transfer my data from an old hard drive to a new SSD?
Yes, you can clone your existing hard drive to the new SSD using software like Acronis True Image. This allows you to keep your files and settings intact during the transition.
How much storage capacity do I need for my SSD?
The storage capacity you need depends on your usage. For basic tasks, 256GB may suffice, while gamers or content creators might prefer 1TB or more to accommodate larger files.
What tools do I need for the installation of an SSD?
You will typically need a screwdriver, an external USB enclosure for cloning, and possibly a SATA to USB adapter if you are using a 2.5-inch SSD.
Will upgrading to an SSD improve my gaming experience?
Absolutely! An SSD can drastically reduce load times in games, allowing for a smoother and more enjoyable gaming experience.
How do I configure my BIOS after installing an SSD?
After installation, enter the BIOS setup during boot and ensure that the SSD is recognized. You may also need to set it as the primary boot device for optimal performance.